Friday, June 7, 2013

Lamp Design


This year my senior Product Designers undertook the ambitious task of designing a commercial prototype for a lamp. This would take them through the full design process and would enable them to learn much about design by simply doing it!

We began initially discussing and investigating various forms of lamp designs on the market, but we were particularly keen to investigate designs that went beyond pure functionality and incorporated creative qualities that also made them aesthetically pleasing. For their particular lamp concept, I provided them with one significant guideline and that was their final design should be inspired in some way by their home country of Japan.

They began by researching appropriate images and developing a concept. This was converted into a small prototype model from which final refinements were made. A plug and globe socket was purchased from the hardware store from which measurements could be taken. Once the design was finalised, construction began using readily available materials (ie wire, wood, plastic forms) that were carefully crafted to form the proposed concept. To finalise the piece, spray packs were used to achieve the desired colour scheme. It all sounds very simple and straight forward, I can assure you that many hours were spent developing the design from idea to the final switching on of the lamp itself.


Positive, Negative and Neutral Spaces


A focus of recent discussions in my Grade 9 Sculpture class was about how artists explore the use of space in their works. We initially experimented with 2D shape before moving to 3D exercises and at the same time looked at contemporary artists such as Australian sculptor Simeon Nelson. As composition is often a challenging aspect of sculpture for students at this level, I decided to set them some perimeters from which they could develop their own abstract sculpture to be based upon the use of positive negative and neutral spaces. It became like a game in which the rules should be strictly followed.

So here were the guidelines…
  • Each student would use 10cm square panels. Solid squares (made of coreflute card) would represent the positive areas. The empty spaces in and around the sculpture would be the negative spaces and perforated squares (plastic weed matting from the hardware store) would be the neutral spaces.
  • For visual interest, three coloured panels of primary colours were also to be added somewhere in the sculpture.
  • Reinforcing sticks would be used to support the panels and may be incorporated as part of the design.
  • No more than two panels of the same type could be placed along side each other (that included internal negative square spaces too).
  • The sculpture had to stand at least 3 panels high, but should have a base no larger than three square panels.
  • The panels and stick frame would be held together with a combination of PVA glue and hot glue.


The exercise not only tested the student’s compositional skills, but also their measuring and construction capabilities as well. While several students went beyond the 3 panel high limit, they quickly realized that the higher they went, small errors at the base became more and more exaggerated. In the end the better designs were lower in format and remained relatively simple, with the overall effect of looking like they had come straight from the Bauhaus workshop. The students certainly enjoyed the challenge that this project provided and the game format made the notion of developing abstract composition far more interesting.


Friday, April 12, 2013

Collaborative Sand Sculptures


Continuing the over-arching theme of collaboration through Visual Art, my Grade 8 class tackled a smaller sculptural project based upon the theme of ‘cultural structures’. They investigated architecture and building structures that are identified with various cultures. With a range of collected visuals in hand, each student set about creating a simplified shape that could be repeated and adapted into an interesting sculptural form. As a class group we began to study the early ‘pigment works’ of Anish Kapoor and used these particular floor sculptures as inspiration for the pieces we would eventually create.

The first task was for each student to further develop their initial idea into a small ‘mock-up’ style sculptural model built from coloured cardboard and composed with each shaped piece rotating around a centre axis. The class was then divided into groups of four, with each student bringing their mock up idea to the table and discussing collectively the merits of each design in order to determine which one could be developed further into a larger scale presentation. Once a final decision was made, the group set about creating a template of their chosen shape and each member took responsibility for building one quarter of the final piece.

The groups used ‘foam core’ boards to cut their shapes. This is quite a rigid material that would allow the piece to stand reasonably tall but was also easy to cut with a knife. Once the shapes were cut, coloured sand was applied with PVA glue. While this technique wouldn’t totally replicate the finish of Anish Kapoors works, it would provide a distinctive presentation and identify each group by its own specific colour. The students enjoyed the process of construction and worked well in delegating tasks to each other.

We initially displayed the mock up models of the design, which were quite effective in themselves. However the final sand sculptures were much more successful in capturing the scale, goals and inspiration behind the work. The end result looked equality strong individually and as a collective whole. Once again the learning in this particular piece was not only from the research and idea development, but also from what was gained through working in a collaborative way to produce a creative artwork.


Saturday, March 2, 2013

The Big Bottle Project

One of the important components of my Grade 8 Visual Arts course is the ‘Collaborative Art Unit’. This unit of work focuses upon the role of communities or groups of artists who decide to join forces to create large-scale works of art. We investigate the practicalities of planning and production, as well as the significance of teamwork when undertaking such projects. Each year my colleague and I look for exciting and interesting collaborative challenges for our students to undertake and so this year we decided to embark upon a project that incorporated the large cement columns that are in the front foyer of the school.

With the help of the school community, we set about collecting thousands of plastic drink bottles that would become the basis for a colourful structure that would surround each column. Each class group where given a theme that represented an element of nature (wind, fire, earth and water), which would become the basis for an individually painted design that would be repeated on a multiple series of bottles. A common colour scheme was chosen based upon shades of purple (our school colour), which would ultimately provide a highly colourful collective design.

After much bottle painting in our four Grade 8 classes, the final mounting of the piece would finally be the culmination of many hours of work. With approximately 100 students involved, this collaborative effort was always going to provide an impressive large-scale piece, but even we were surprised by the impact it would eventually have on the space.

Friday, November 9, 2012

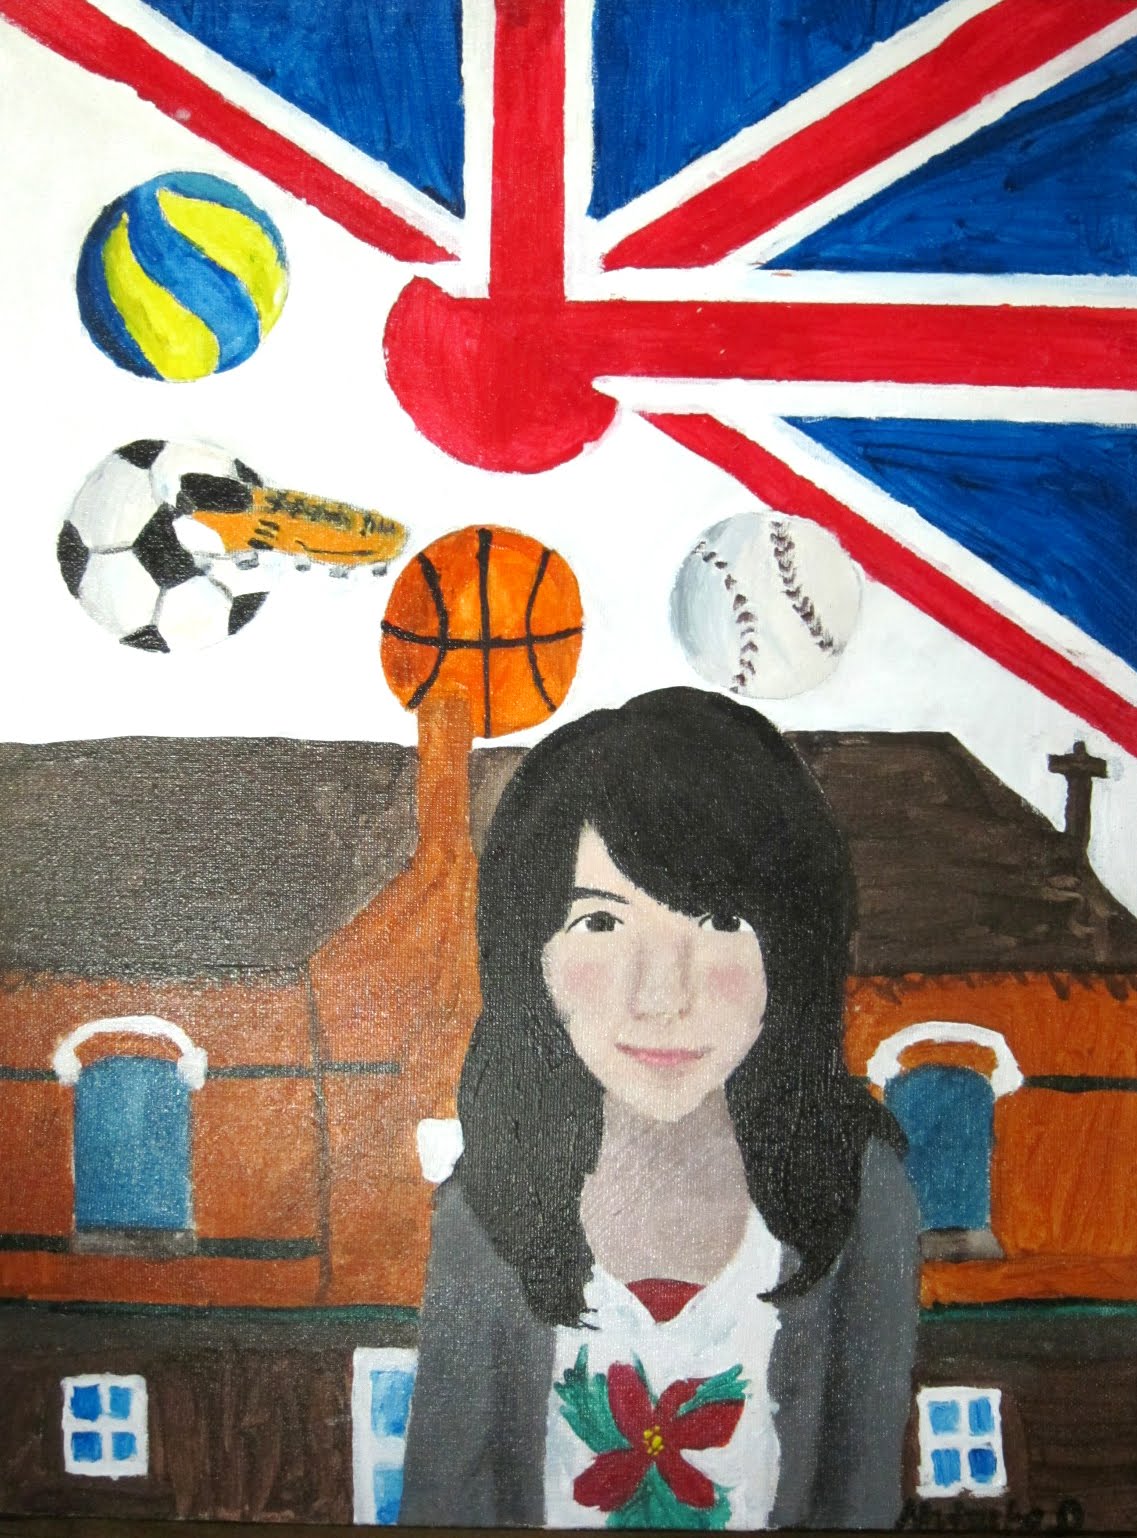
Self Portraits

One of the major painting projects that my grade 8’s undertake is a self-portrait. This is a particularly challenging task even for the most experienced of artists, but every time we undertake this task I am always amazed by what they manage to achieve. As well as looking at a range of painters and their various techniques, we spend quite a bit of time investigating and considering both subject and composition. Through discussion and research the painting inevitably becomes more than just a self-portrait, but a visual statement about themselves and the various facets of their lives. We explore the theme of ‘Relationships’ by looking at aspects of context, cycles, culture and self that eventually become intertwined in the painting. Through this process students become increasingly aware of the significance of painting in creating an artifact of its time, which is carefully created by the very person who is the actual subject matter of the work. As a result this piece is probably the most valued piece of artwork created by the students during the year and always attracts great interest in the school when the collective portraits are displayed.

Friday, October 19, 2012

Furniture as Art

One of the new courses that we offer to our students is Product Design. This course allows students to consider the interesting balance between form and function when creating utilitarian objects. One area of particular interest is the evolution of form and our ever-changing notion of aesthetics as applied to furniture design. Students are asked to think about the notion of furniture as something beyond pure functionality, but rather something that is a reflection of taste and personality…a post-modernist notion, I know! For example, a chair might be a something to sit on, but it is also a piece of sculpture that has a prominent place in our daily living environment. With this in mind my students were given the task of designing a piece of furniture that had three distinct functions (ie. chair, table and storage), while also providing significant sculptural qualities that are reflective of themselves. After some significant thought and planning they set about producing a model of their final idea using light weight wood and any other available materials that would allow them to represent their concept in a three dimensional form. They then photographed their model and using Photoshop created a suitable promotional poster. This enabled them to visualize their design to scale and view it within a real world context.

Friday, October 12, 2012

People Pots

One of the popular units of the Grade 8 course combines both ceramics and drawing as the students look at both functional clay artifacts and the cult of personality as inspiration for their studio work. In particular, students investigate a person who is significant or inspirational to them at that time in their lives. The choice of people is always quite interesting, but generally students will tend to choose high profile personalities from the entertainment world, sports or notable people who have been in the recent press. They are asked to find a quotation from that person and associated imagery that might provide inspiration for a ceramic piece which captures the essence of that person, much like a canopic jar from ancient Egypt, but created within a modern day context. Of course there is plenty of class discussion that allows the students to arrive at their final design. Likewise, other lessons focus on drawing and clay building skills, which are essential in gaining the confidence to achieve their goal. The range and detail of the lidded pots they develop are always fascinating as they grapple with the theme and also the subtleties of ceramic hand building. This year their pottery pieces and the drawing of their chosen person were combined together for a diverse and impressive display of creative forms.

Saturday, October 6, 2012

The Power of Collaboration

On of the popular units of grade 8 Art involves students working together on a large-scale projects. The size of the collaboration can take many forms, from maybe a small group of four through to our full contingent of grade 8’s, which is around ninety-four students. Projects often require a high degree of teamwork and organization, but the adage of ‘many hands make light work’ is certainly the case here, with the result being some impressive large-scale pieces. This was the case with a work that was based on Jeff Koons famous ‘Puppy’ Sculpture and while his piece was completed three dimensionally we decided to produce a two dimensional version made from a collage of coloured pieces of paper attached to cardboard panels. When completed these were ‘planted’ to the ground by wooded skewers in our outside courtyard. With every student completing one or two panels the size was quite enormous with the full effect best viewed from three stories high. Another piece saw each student working on a long horizontal strip of paper to create a section of an enormous tree. In the background small coloured squares were decorated in pastel, each with its own distinctive pattern (much like the pixels of a modern day Chuck Close portrait). With different classes working with alternate colour schemes for the background, the final pieces, when joined together, formed an intriguing and elegant piece of collaborative art.

Friday, September 21, 2012

Drawing Ancient Pottery

My grade 8 class were beginning to investigate the area of pottery and ceramics for the first time and as part of that process we collected quite a few photographs of works from ancient cultures. We were looking particular at the various forms and the use of pattern and decoration. This also gave them an opportunity to use this subject matter as a basis for a drawing and to look at rendering three-dimensional forms through the use of ellipses as well as light and shade toning. The students selected a coloured piece of paper and began there drawing by imagining that their piece of pottery was on the verge of being discovered; as if the wind had blown away the desert sands to reveal it. To achieve this impression they folded their paper in half diagonally to provide a centre axis for the pot, and then began by drawing one side then the other. We had previously undertaken some exercises in ellipse drawing, so the students were quite familiar in using this technique to achieve a three dimensional quality. Their drawing was further enhanced by the use of white pencil as a contrast to the graphite pencil to produce a strong result.

Tuesday, September 18, 2012

The Artists Bag

An interesting sculptural project that was undertaken by my grade 11 students was to create ‘an artist bag’. This would not be a functional bag, but a creative and expressive bag that would be influenced by specific culture in which the artist had a personal connection. Of course, with such a project there was plenty of discussion and pre-planning, but once the final concept had been arrived upon it was down to getting on with the construction. Each student was given a standard file box as a starting point (this meant that the scale and format would be consistent), which could be cut with a knife or details added using hot glue. It was terrific that the students went bold and adventurous with this task adding materials such as plaster bandage, rocks, metal, fabric and paper mache. The most difficult was generally the strap of the bag, but as it wasn’t a functional bag and didn’t need to take any weight there remained plenty of creative options available. Set with the challenge of creating an open ended sculptural form, the students were able to achieve some brilliant results.

Sunday, September 16, 2012

Illustrative Drawing

My grade 11 drawing class were very keen to extend their skills with an illustrative style drawing. This would be a detailed and planned illustration based around the theme of ‘fame and celebrety’, which would give them plenty of scope to focus on someone who they particular like as the subject matter. They brainstormed some possible imagery, then followed his up with some visual research. Photoshop is terrific for planning this type of drawing, as it allows the students to experiment with scale and composition. Eventually, they had their reference source and were able to begin their drawing on ‘Cresant’ illustration board. They blocked in the initial outlines then set about adding the detail from observation (no grids were used). Emphasis was placed upon using different grades of graphite pencil to achieve light and shade to create a bold realistic image. Needless to say, several hours were spent in create some highly polished results, but I must say that the enthusiasm of the students never waned.

Extruded Forms

An easy way to adapt a two dimensional shape into a three dimensional form is to ‘extrude it’. This means literally lifting the image vertically from the paper to create a floating shape that can be bridged with a selected material. Of course, this is easier said than done and in sculptural terms it requires some major structural considerations. My grade 9 sculpture class was given such a challenge when they were asked to build an extruded sculpture based upon two combined and unrelated shapes. They began with a scale drawing, which was used to form the two cardboard ends. The gap between the ends was bridged with strips of foam core (a stiff cardboard material). The sides of the sculpture was then wrapped with a thin polished metal sheeting which was beautiful to look at but difficult to use as it had to be cut with tin snips. Hot glue guns that were used to join the initial foam core bridging and the metal. Through patient bending, folding and gluing the metal sheeting was wrapped around the form and carefully cleaned to remove excess glue and finger marks. The ends of the sculpture were then covered with then covered with a colourful plastic material, which also needed to be cut to match the shaped. The final sculpture was then tilted vertically and mounted upon a white baseboard. The final sculptures were very impressive, but it considering the simplicity of the forms they did require quite a number structural skills, so I was particularly proud of their achievements.

Saturday, September 15, 2012

Ladder sculpture

This was a very successful project undertaken by my grade 10 Sculpture class. This class was smaller than usual, which allowed scope for a slightly bolder project. The task involved looking at the element of ‘balance’ in sculpture and the way in which some works emphasize this through dynamic composition. We set about the task by thinking about the process of a person climbing a ladder and the balance required for this simple action. We though about of all the things that could happen on the way up and unusual circumstances that might occur. Consideration to human proportion and body movement in the planning, but essentially the aim was for the sculpture to provide a narrative. The students began by creating a ladder with heavy gauge wire, which they soldered together. The figure was then created using thin wire then covered with plaster bandage leaving contact points of metal that could be soldered to the wire. When the structure was holding firm they then painted the whole piece black before burnishing it with bronze paint to provide the metallic finish. The final challenge was to drill holes at the desired angle into a wooden base to allow the sculpture to stand on an angle. The finished pieces caused quite a reaction when they were displayed around the school.

Overlapping Images

My grade 10 painting class was investigating the works of Cubist and Futurist painters and was set a task of visually deconstructing an object from home in a drawing, then reconstructing the images to form a composition for a painting. The aim wasn’t particularly to focus on details, but more the shapes, both positive and negative, that made up the form. With various images overlapping, the students then chose a simple colour scheme to differentiate the various shapes. Each student took their own approach to the painting style; some painted with flat areas of colour while others were more tonal. The only insistence was that the colours were mixed and not straight from the bottle. The end results were visually strong and certainly showed an alternative approach toward observation drawing.

Friday, September 14, 2012

Wire Portraits

I was introducing my grade 10 Sculpture class to the use of the wire and solder as a sculptural medium by having them produce a continuous line portrait of someone they admired. Of course this initially involved them producing a continuous line pencil drawing first, which for most was a challenge in itself. However with this complete we enlarged it on the photocopier to produce a template that they could lay out their bent wire. While they generally tried to keep their wire to one continuous length, this was not always possible and it was clear that some simplification and adjustment would need to be made. Fortunately each student was able to have there own soldering iron for this task and they successfully achieved their goal quite quickly, with some really nice results. Legs were added to each corners of the final piece and they were finally mounted onto cardboard for display.

Reflections and Distortion

In order to provide my grade 9 painting class a different perspective on their world I set them a little task to produce a small self portrait as seen through the viewpoint of a reflection from a spoon. This really became an exercise in observation as they looked deeply into what was effectively a small concave or convex mirror to provide a somewhat distorted image of themselves. To highlight the shininess of the spoon they were also asked to paint directly onto black paper, which most had never done before. While the students tended to provide a stylised version of their portrait, their handling of the overall form and the background was interesting and they were pleased with the results.

Thursday, September 13, 2012

Wire Figures in Action

In my year 9 sculpture class we were investigating the human form and in particular the ability of the artist to capture those unique moments when the body is in action. As many of the students had not worked toward a three-dimensional form before, we decided to use some cheap light gauge wire to create a small maquette of a human figure as a trial run for a larger sculpture. As we were also looking at the form of the body, the aim was to try to make them proportionally correct. Using a small pair of plyers they created some very creative poses that included athletes, circus performers and rock guitarists that stood less than 10 cm tall. I particularly like the ones that had achieved a sense of tension in their pose. This comes at the moment in which energy is tranferred or expelled during the moment of action.

Friday, September 7, 2012

Painting the Human Skull

My painting class was investigating colour mixing and in particular the use of ‘neutrals’ (black, white and grey). So they were given a task of drawing a human skull; three of which were generously loaned to us by our science department (the plastic variety of course). As a sideline we talked about the uniformity of most skulls compared to the uniqueness of the human face. Many students had never held a skull in the hands let alone drawn one before, so there was a macabre fascination in the exercise. After creating their initial drawing on buff sheet of paper they mixed black and white paint to shape and follow the contours of the skeletal form, paying attention to interplay of light and shade.

Drawing Marathon

Our school was fortunate enough to have a visiting artist for a day of life drawing. She had brought with her a colleague who had a terrific collection of vintage clothing from various eras, which she would change into throughout the day in order to provide just a little more contrast in the subject matter. All of the Art classes were invited to attend a session throughout the day, which resulted in some large groups who were of wide variety of ages. The session created great interest within the school community, culminating in a packed final session after school of interesting students and parents attending. The ‘drawing marathon’ resulted in pages and pages of fabulous drawings and a greater appreciation of the observational study from all who attended. Ranging from frantic 30-second poses through to more relaxed 20-minute poses, each drawing provided its own set of unique challenges, yet each was up to the task. The day was tremendous success and will no doubt become regular Visual Arts event.

Thursday, August 30, 2012

Wind Sculptures

For most students Sculpture is an interesting and challenging aspect of the Visual Arts. Working in three dimensions to create a form is not easy, particularly if you are working with lightweight materials such as wire and you’re also trying to make it look good and move at the same time. This was the case when my grade 10 Sculpture class was given the challenge of creating a kinetic sculpture that moves from the power of the wind. They had just learnt some soldering skills and were keen to build abstract forms (inspired by the works of Calder and other artists), but this task would require considerable research and planning. Initially they investigated a range of ‘wind capturing’ forms before developing their own unique design. As well as building the wire structure, the students applied tissue paper, which was later painted with primary colours for effect. There was considerable testing and design modification throughout the construction process, which was assisted by having a portable fan continuously in operation in the room. The students had to consider the balance between aesthetics and functionality, but particularly enjoyed seeing who could get the most dynamic movement from their sculpture.